Step 2 After uploading the image Insert it to the canvas. Once two layers are selected the Slice tool will become active.

Make Rounded Corners In Cricut Design Space Free Svg Rounded Shapes Cricut Design Cricut Round Corner
Select Continue to proceed to the cut interaction.
How to cut images in cricut design space. I wanted to share this quick tutorial today for anyone who is using my print and cut or just regular cut files on their Cricut software but only wants to use part of the image. Step 3 Duplicate your image for as many colors you want the image to have. This will select all of the images that are on the canvas.
You dont need to own an image to try it out - Design Space allows you to design with an image before you buy so you can make sure it will work on the project. A Print Then Cut image is where you want to print the exact design and have the Cricut help you cut it out seen in another tutorial. Once you have inserted printable images in your project or changed your images Linetype to Print select Make It from Design Space.
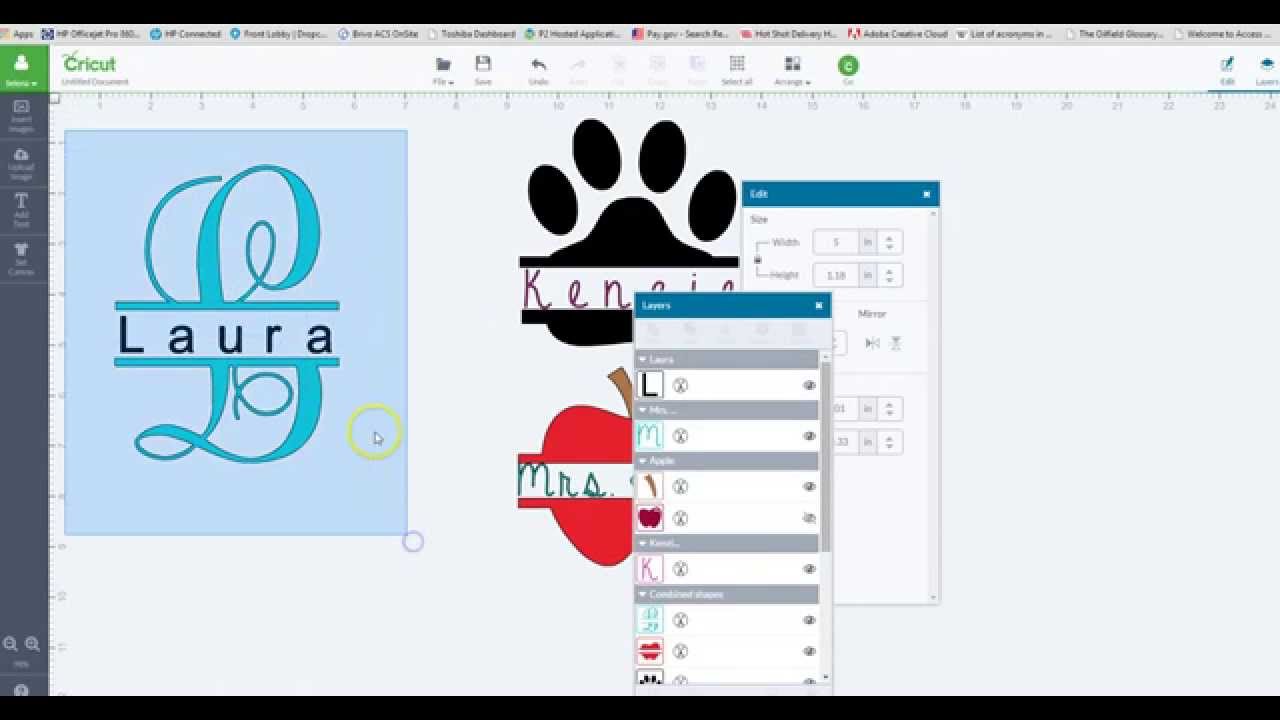
A preview of the image with an added cut sensor marking rectangle outline will be shown. Find out what the Slice tool does how to use it and what it can do to enhance your multi-layer project. Httpsbitly2H26R9nTaking apart two different images and welding them together to make one project in Cricut Design SpaceThis video and.
A bounding box will appear around both images and the individual layers will be highlighted in the Layers panel. Step 4 In the top menu bar click on the Select All button. Select both images by holding the Shift or the Ctrl key on your keyboard while clicking on each layer.
This tutorial teaches you how to slice images in Cricut Design Space the online design software for Cricut Explore. Shop at Cricut. Sometimes you will get a file containing multiple images or motifs and you want to only use certain parts of the file.
Step 1 - Select Upload on the design panel to the left of the CanvasUpload Image allows you to work with basic image types including jpg bmp png and gif image files as well as vector images including svg and dxf filesTo begin select Upload Image. Step 1 Import Your Custom Shape to Design Space To import your custom shape click on the UPLOAD button which is on the bottom of the left side toolbar in Cricut Design Space. Step 1 Navigate to the SVG file.
Step 2 - Select Browse to open the file selector and locate the image you want to use from your computer or simply drag and drop the. The max size for Cricut print and cut is 9 x 675 and. Step 5 In the top menu bar click on.
On the next screen click select your machine from the drop-down menu. In this video I will show you how to print out bigger images that you design in circuit design space. Additionally you can upload your own images and cut them out with your Cricut machine.
The Cricut Image Library contains over 100000 images with more being added all the time.

Pin On Cricut

Pin On Cricut How To And Tips

Pin On Cricut

Pin On Crafts

How To Edit An Uploaded Image In Cricut Design Space 2 0 Cricut Tutorials Cricut Design Cricut

Know What You Want To Do In Cricut Design Space But Can T Remember Which Command To Use Then I Ve Got A Quick Refe Cricut Tutorials Cricut Help Cricut Design

Pin On Cricut Design Space Best Tutorials On The Web

Maximum Layout Sizes On Cricut Design Space Based On Your Browser Cricut Cricut Expression Cricut Tutorials

Pin On Everything Cricut

Pin On Die Cuts And Electronic Cutting Machines

How To Slice Crop In Cricut Design Space Cricut Tutorials Cricut Design Cricut
Cricut Design Space Split Image Text Using Slice Weld Cricut Explore Tutorials Cricut Explore Projects Scrapbooking Cricut

Pin On Crafty Gifts

How To Use The Offset Tool In Cricut Design Space Make Outlines Shadows Cricut Design Studio Cricut Projects Beginner Cricut Projects Vinyl

Pin On Hey Let S Make Stuff By Cori George

Pin On Cricut Supplies

Pin On Cricut Ideas From Bloggers And More

Pin On Cricut Design Space Tutorials

Pin On Cricut Tutorials

